How to use SiO2 Finance
Connect Metamask to SiO2
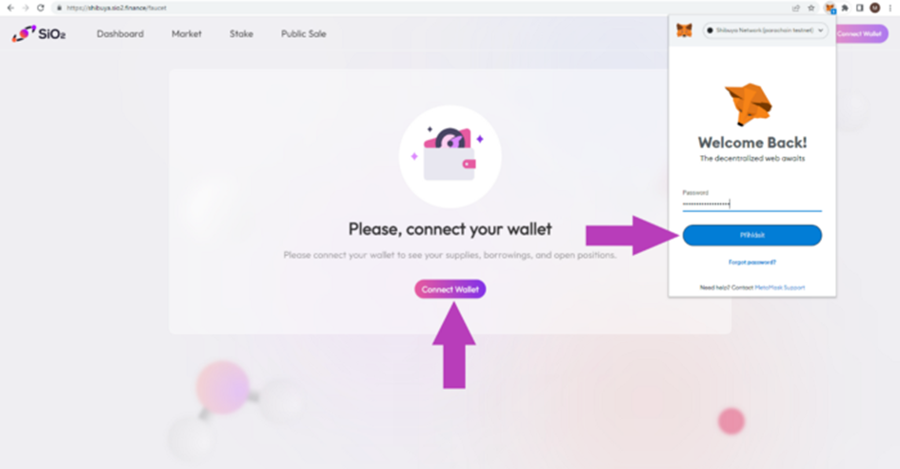
Go to our SiO2 website and click on “Connect Wallet.”
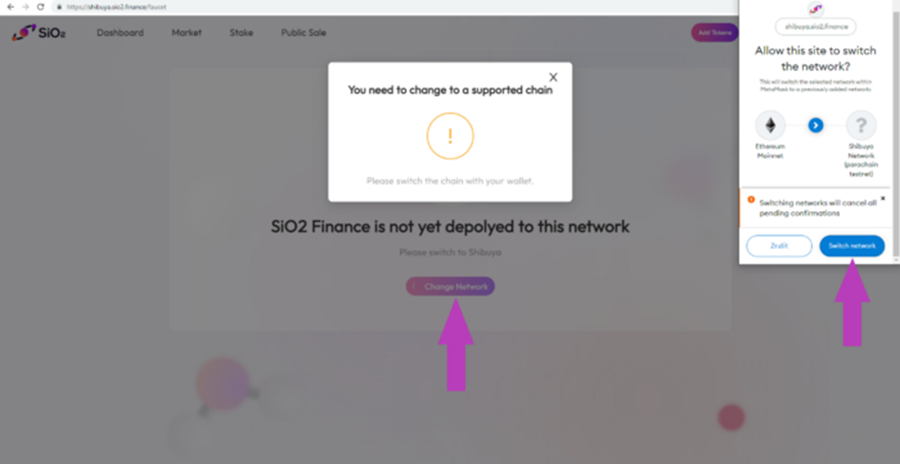
If you are not already connected to Astar Network, click “Change Network” and confirm it in your MetaMask wallet.
Supply
Now go to the “Dashboard” page and click on the “Supply“ button in your chosen crypto. “Supply APY” indicates the reward rate from interest. “Supply APR” indicates the liquidity mining reward from SIO2 tokens.
Next, enter the amount that you want to supply and hit “Supply.”
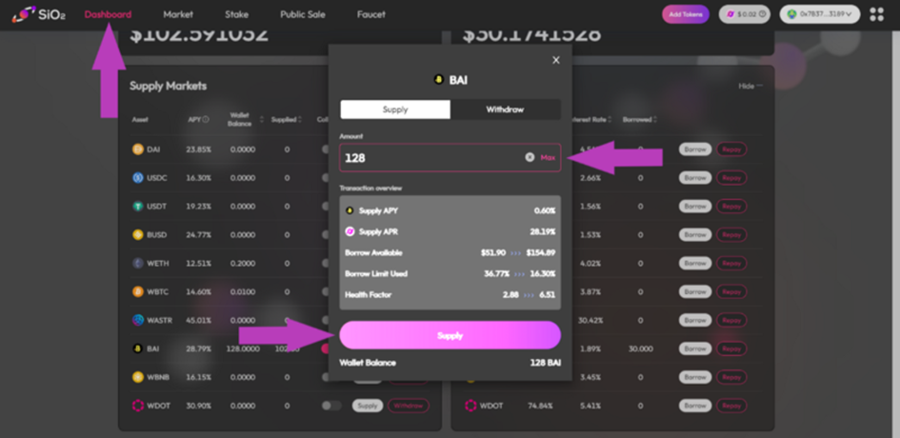
Approve this action in the MetaMask wallet.
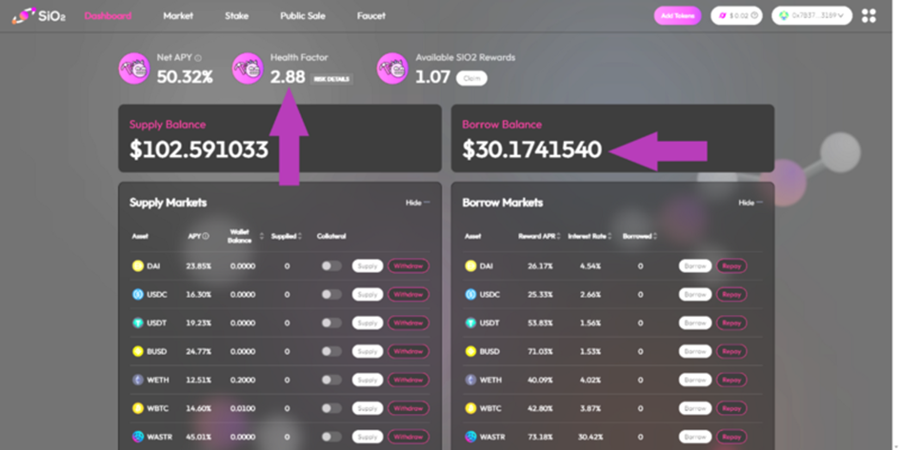
Now you can see your “Supply Balance,” “Net APY,” & “Available SiO2 Rewards,” which you have earned so far.
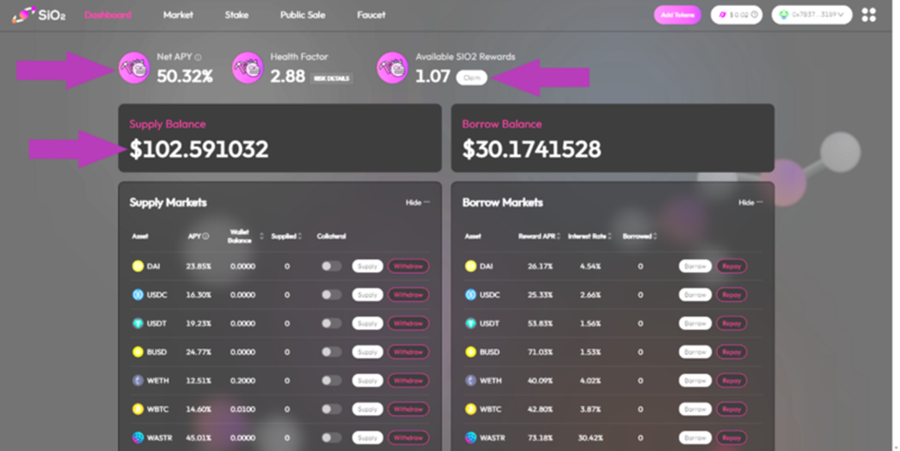
If you want to harvest them, push the “Claim” button and confirm the transaction in MetaMask.
Borrow
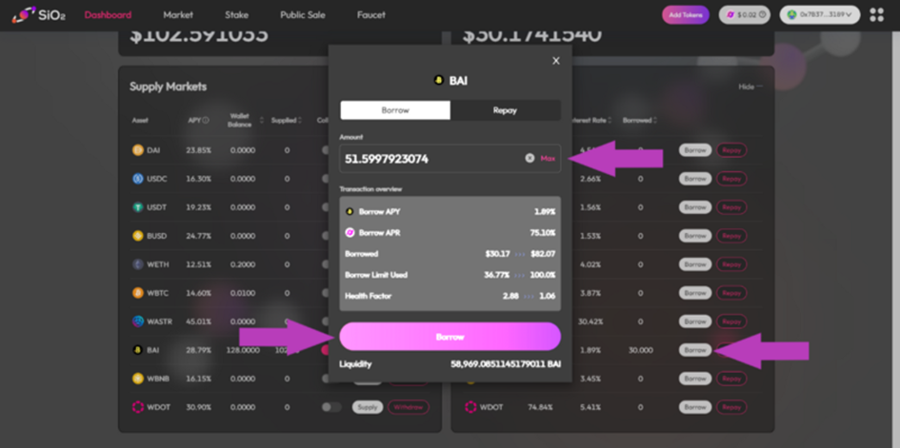
If you want to try our borrow feature, choose your desired crypto and click on “Borrow.” “Borrow APY” indicates the interest rate that you have to pay. “Borrow APR” indicates the liquidity mining reward from SIO2 tokens.
Next, set the amount you wish to borrow and push the “Borrow” button in the pop-up window.
Confirm this transaction in your MetaMask.
Now you can see your “Borrow Balance. “ Remember that your “Health Factor “has to be higher than “1”! Otherwise, liquidation happens.
Staking
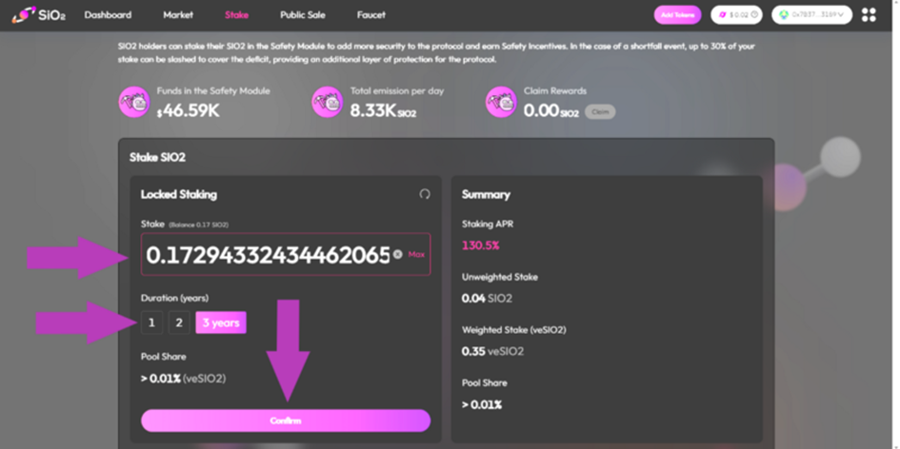
To stake, go to the “Stake “page. Enter the desired amount you want to stake, choose “Duration, “ and hit the “Confirm” button.
Approve transaction in your MetaMask wallet.
Now you can see the “Summary” of your stake with APY, Unweighted / Weighted Stake, and Pool Share!
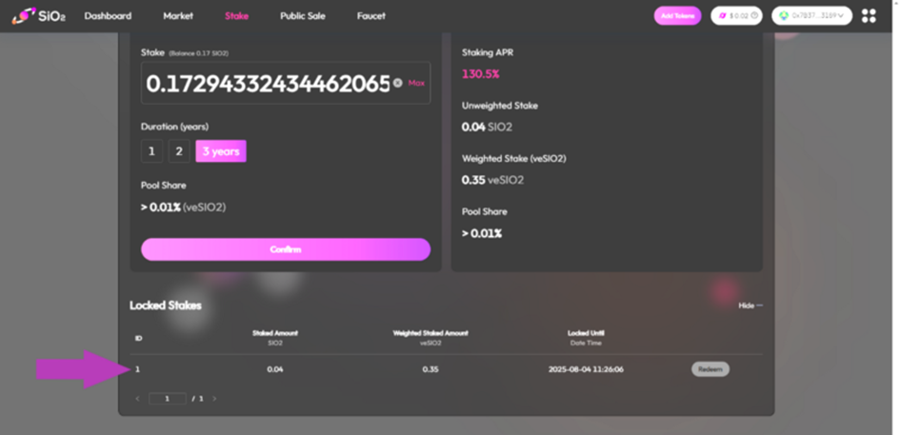
If you scroll down, you will see your “Locked Stakes “with the “Date & Time “ending period.
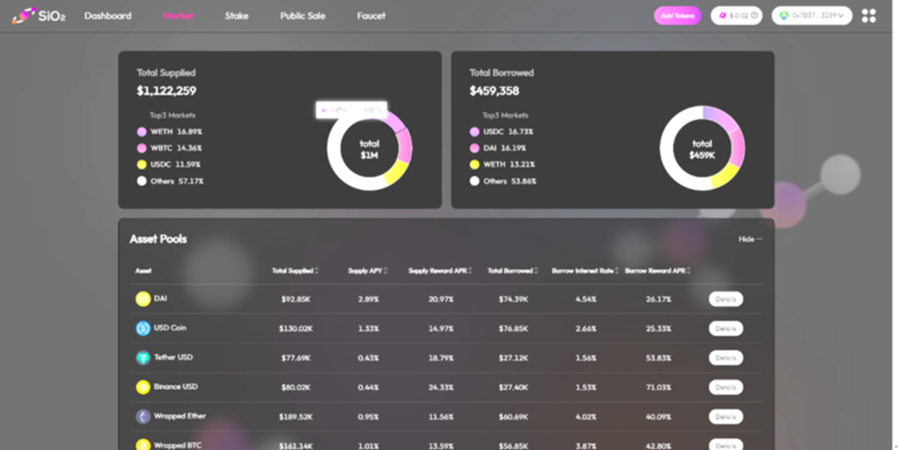
Statistic Page (Market)
Here you can check information about total “Supplied “& “Borrowed” assets.
We hope that this tutorial helped you and you could calmly and seamlessly set up your MetaMask wallet and then test our platform. If, after all, there is a problem, whether when supplying, borrowing, or staking on our platform. Do not hesitate to contact our Admins, Moderators, or Ambassadors on discord; they will be happy to help you and explain everything.
Last updated